This rabbit hutch was built from four free pallets, a roll of rabbit floor wire, wood screws, scrap plywood, a tarp, hinges, and a latch. Nothing more, nothing less. Using pallets for lumber was certainly a new experience and should I decide to build another hutch, I don’t think we will be using pallets again. Although you save close to $60 in lumber, it is a pain in the bootycakes to pull those things apart. If you can spring for some 2×4’s and plywood –go for it! If not, this tutorial is for you.
You will need:
Skill saw/radial saw
Cordless drill driver
Hammer
Crowbar
(4) wooden pallets in decent shape –ours were 48″x38″ with a few boards on the back
30″ wide x 10′ roll of 14 or 16 gauge rabbit wire in 1″x1/2″ (friendly size mesh for bunny feet)
(1 box) 2 1/2″ wood screws
(1 box) 1 1/2 – 2″ wood screws
(1 box) horseshoe nails
(2) hinges
(1) latch –do not use a hook and eye; raccoons are smarter than you think
First off, disassemble all of your pallets trying to keep all of your pieces intact. We ran the saw down the insides of the first crossbar to ease the bigger boards off. Give yourself a good, full day to disassemble all four pallets… maybe more. Most pallets are put together with corkscrew nails, not screws. These corkscrew nails look like normal nails, but have grooves in the sides to prevent them from being pulled out easily. These corkscrew nails are what you can attribute the cause of that headache you have later on to.
Use this diagram as a guide in constructing the frame of your hutch. The 38″ walls shown changed a bit in our actual construction so please take your own materials and their size into account when building your hutch. The pallets you find may be smaller or larger. Adjust accordingly. Our 38″ height walls ened up being 14″ legs and 24″ walls from floor to ceiling; all as one piece.
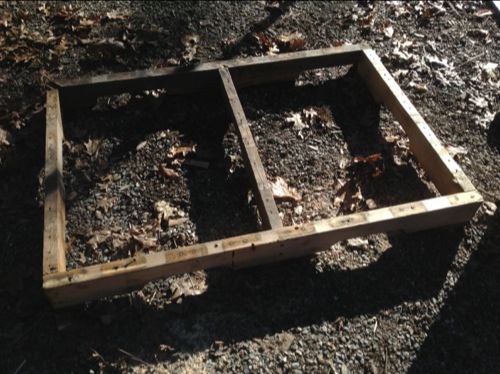
We built the frame for the floor using the diagram above. The wood used was from the 2×4 crossbars of the pallets and not the wide, thin boards. The two long sides are 44″ inches and the two short sides and center crossbeam are 27″ inches (the thickness of my boards ended up being 1.5″ inches and not .75″ inches). Attach the short sides to the long sides using two screws through the long side and into the end of the short side as shown.
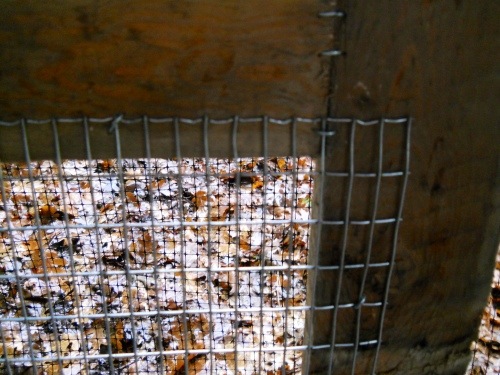
Your finished bottom frame should be 44″ x 30″. Next, roll out your wire and adjust so that the 30″ width is flush with your short sides. Use the horseshoe nails to tack the flush sides down well. Then use a piece of thinner board to create a trim piece to fit on top of the cut ends of your wire. The wire should overlap your frame and then be covered by the trim pieces. Screw the trim piece onto the frame being sure to catch the screws in between the wire squares. this will ensure that the wire stays taut.
Now build the same frame as you did for the floor to support the roof. Obviously the roof frame does not need wire.
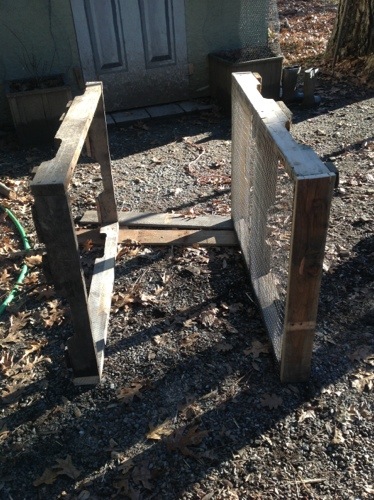
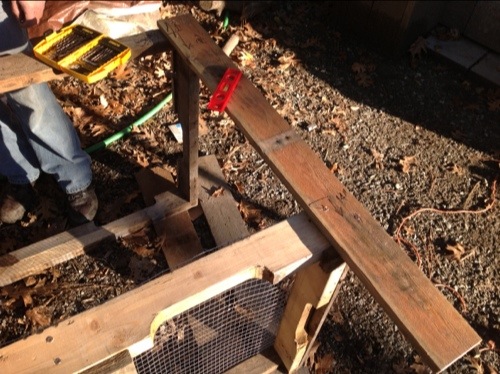
Set your frames up and see how tall or short you would like your finished hutch. We wanted our hutch with tall enough legs for a dropping pan to slide underneath and still have ample height inside for a comfortable living space.
The sturdy boards we chose for our hutch legs were 38″ inches tall. 14″ inches were used for the leg (measured from the ground to the floor wire) and that left a generous 24″ inches for the inside height (measured from the floor wire to the bottom of the roof frame. Measure twice and mark your leg boards before screwing them to your frames!
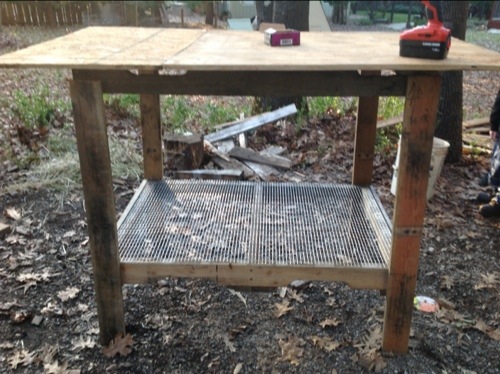
Ta da! If you’re with me so far, you should have a complete hutch frame ready for a roof, walls, and door. This is a winter hutch so all three sides will be solid wood. If you are building a summer hutch or live in a mild climate (we expect snow for the next three to four months) you can wire the whole outside and just skip to the door. Add a roof from scrap plywood pieces or even pallet boards if you think you have enough.
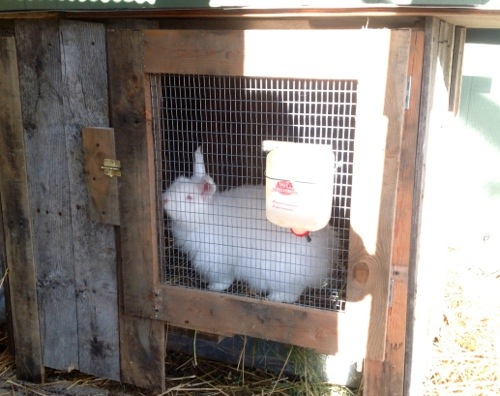
Screw on the walls using the thin, wide boards from your pallets. If there are any obvious gaps, just screw another board over it. This is a hutch made from pallets people… it ain’t gunna be too pretty. The hutch looks wet because we just moved it to its permanent spot during a rain storm.
Door: Measure the hole you need to cover. We used a few boards for the front to make a more sheltered hutch, so yours will have a different sized hole than ours. Measure and create a frame using sturdy pallet boards. Nail together at the seams with horseshoe nails on both front and back. Then use horseshoe nails to nail the wire to your door frame. Mount the wired door to the hutch with hinges and figure out where to put your latch.
All done! You may find a few tweaks are needed depending on the size and type of pallets you acquire, but this is really just a rough guide. Bigger hutches can be made if you have larger pallets. Sorry about the sad looking pictures, but it is raining something fierce outside for the foreseeable future and everything got wet as we moved the hutch under the deck. But no worries! With a thick tarp and some hay on the ground, this hutch looks cozy enough for a full grown rabbit to call home in the worst of winters here.











It looks great!
Thanks!
Thank you for the tutorial. I love it when something is thoroughly explained!
I try my best! Let me know if you have any questions. I’m always happy to answer!
your website is like an encyclopaedia for me, thanks.
I’m curious about airflow for the bunnies…will it be too hot for them in the summer?
It does get to be a high of 100*F here, but with the well ventilated lattice walls, a large fan, and frozen after bottles, the rabbits do just fine in the summer. There are of course a few uncomfortable days, but all the rabbits are sheared right before the worst of the heat so they don’t have those heavy wool coats to worry about.
Oooh I never thought about putting frozen water bottles in with them.. does that mat their coats?
Doesn’t seem to. But then again, I clip their hair/wool before it gets hot enough for frozen water bottles as an extra precaution. I’ve found that those big grape juice bottles are much sturdier than 2-liter soda bottles.
TY very much for that great tip 🙂 I was wondering how they would manage in the summer:) I found your site by accident (looking at at making my own fodder system too) and when I saw your site I was like “wow! someone else that thinks like me!” lol Once I’m all set up, I’ll send you some pictures 🙂
I would love to see it when you have it going! Thanks for reading!
Pingback: DIY Rabbit Hutch - Craft Pawty
I did a similar hutch, but with a couple of differences.
1. Prying individual boards off the pallets takes forever and you wind up busting a bunch in the process. I use a reciprocating saw with a 12″ blade instead. Just slip the blade between the 1″ slat and the 2″x4″ skid and cut through the nails. This way you can dismantle the pallet in a few minutes. It isn’t like you’re going to save those crummy nails anyway, right?
2. For the roof I took a pallet, redid the slats so they were solid, then shingled it with license plates. I don’t know how it is in CA, prob some regulatory agency with armed staff responsible for license plate disposal (joke) but here in Texas you just go down to the tax office and they’ll give you a box of old plates for free. They make fantastic shingles, and you can also bend them to make urine guards so the bunny pee doesn’t soak into the wood floor frame.
We used a saw to cut off the ends of the boards as you suggested to save ourselves some effort. But the center of each board was also nailed to a brace in the middle of the pallet… in some cases the pallet had two center braces. So in order to keep a decent length on the boards, we did still have to pry the centers off of the braces. Otherwise, if we had cut off every point where the was a nail securing it to a brace, we would have ended up with a million boards no longer than 10 inches! Oh, the pains we go through to save a dollar! It really does all depend on what kind of pallets you find.
Great idea on using the license plates as urine guards and shingles!!! I highly doubt the tax office would just hand over old license plates around here (you may joke, but it’s so true…), but there’s no harm in asking I suppose. Thanks for the tip!
Actually the saw she recommended will cut the actual nail in half 🙂 You don’t need to cut the wood! It makes breaking a pallet down very quick.
Thanks for the great post! We are going to be venturing into raising meat rabbits, and I plan on building a few of these hutches with the pile of pallets i have!
That’s a great idea about the license plates – thanks!
I use a sawzall to cut through the nails so you get full length boards, just be carefull!
Pingback: 80 Wood Pallet DIY Projects | Rilane - We Aspire to Inspire
Wire floors are very dangerous for rabbits and can cause sore hocks on their feet. I suggest that you adjust your blog to advise people about this, and not advising them of incorrect advice.
I am not “advising” anyone “of incorrect advice”. I have been raising rabbits on wire for several years and have had absolutely NO cases of sore hocks. Wire floors are absolutely necessary for maintaining the health and cleanliness of angora rabbits as a wool breed.
In fact, sore hocks are an indication of poor breeding standards. If you have rabbits with sore hocks I suggest looking closer at your own cleaning habits, breeding lines, and breeding program. Or, just do some more research because I am, frankly, down right sick of people posting such single-minded “advice”, such as this, everywhere on the web.
Thank you and have a nice day.
Do you have any problems with the rabbits being so close to the ground? In terms of predators and/or pesky cats and dogs? Also, do you use these hutches outside or in a shed?
Close to the ground? The hutch floor is 2 feet off the ground. This hutch was outdoors, but inside a fenced-in area under our deck. The main fence kept out neighborhood cats and dogs. A raccoon got into the fenced area one night, but since the hutch walls were wood and only the floor and door were wire, it was not able to harm the rabbit inside. I usually use wire cages inside a shed or in the garage for most rabbits. This hutch was built to quarantine new animals or to grow out young rabbits.
I see. It just looked close to the ground in the picture. Thanks for giving me some information about this hutch. I may just have to build one myself!
No problem… It may look like that because I made the sides go to the ground.
Now that I look at the picture again, I think that is why I thought it looked close to the ground. I am also used to tall hutches (all of mine have the hutch floor about 3 feet off the ground), so that’s just what I am used to seeing!